• Enter your email address to subscribe to this blog and receive notifications of new posts by email.

    Join 226 other subscribers

Introducing the NEW Pocketalker 2.0 Personal Amplifier

As a hard-of-hearing gadget geek, I have a lot of different assisted listening devices.  People often ask me which one I usually carry with me.  No doubt, it was the Williams Sound Pocketalker Ultra.  It is small, versatile, easy to carry and has very good sound quality.

So, I was very excited to learn that Williams Sound has come out with a new (and improved) Pocketalker 2.0 Personal Amplifier!  Of course I had to buy one right away and try it out!  I love it!

images

Pocketalker 2.0

Some of the new features are:

  • smaller and lighter
  • built-in telecoil for use with hearing loops  (If you don’t have telecoils in your hearing aids, you can use this as a receiver in a room with a hearing loop installed.)
  • balance control  (If one ear needs more amplification, you can can adjust the balance.)
  • optional charger   (Can be used with regular batteries or rechargeable batteries.)
  • internal omni-directional microphone (It still comes with an external plug-mount microphone, but you don’t need to use it.)
  • can be used with mono or stereo headphones  (The Pocketalker Ultra had a mono jack and could only be used with mono headphones or adapters.  Now you can use your favorite headphones, earbuds, or neckloop.)

One of my favorite features of the Pocketalker Ultra is the removable microphone. (See my blog posts: “Noisy Restaurant – Recipe for Success.” and “Advanced Tips for Using a Pocketalker.”)  This allows you to add different microphones, depending on the situation:  a lapel mic, a shotgun mic, a headset mic, or a conference mic.  I was very glad to see that the new Pocketalker 2.0 still has the removable microphone, but it also has an internal microphone.  I experimented in several different environments and found it works quite well with just the internal microphone.

pkt_e1_angle_nb

Sleek new look using the internal microphone

And last, but not least, “she” is taller and slimmer (2″w x 4.9″h x 1″d).  Very nice looking!  Would make a great holiday gift!  Click here to buy yours now!

The Way Gael Hears It!

I just finished reading Gael Hannan’s new book, The Way I Hear It, and I LOVED it!  I can recommend it highly to anyone with a hearing loss, as well as their family and friends, and professionals who work with the hard-of-hearing.

Gael-Hannan

I met Gael at an HLAA conference a few years ago and enjoyed her very entertaining and informative presentation.  I have been following her blog at Hearing Health Matters.  If you are not familiar with Gael, you can read about her and subscribe to Hearing Health Matters (HHTM)  here.  Gael is a very talented presenter and writer.  She uses humor to discuss some very sensitive topics, while at the same time sharing insights and advice about difficult hearing loss issues.

I found this book easy to read and well organized with dialogues, tables, and lists such as “Principles of Hearing Loss Success,” “How to Stop Bluffing and Get Back into the Game,” and “10 Good Reasons to Wear Hearing Aids.” Gael shares personal stories, original poems, a few of the articles from her blog, and provides a great deal of helpful information for anyone affected by hearing loss.  Some of the topics covered are communication strategies, hearing technology, traveling with a hearing loss, and working with your audiologist.

Gael had me laughing out-loud at many of her stories, usually because I could relate so well to her experiences.  Her introduction starts with “Living well with hearing loss is achievable–that’s the exciting news” and reading this book will help you achieve that goal.  Click here to purchase Gael’s book for $16.20 from my website.

Book-Cover-2-534x800-200x300

The Trials and Tribulations of Traveling with a Hearing Loss

I am doing a lot of traveling this year between leaving San Diego and moving to Denver.  I wrote about some of my experiences in March when I was traveling in Asia (see “Traveling with a Hearing Loss“).  I would like to share a few more of my experiences as I now am traveling in Europe.
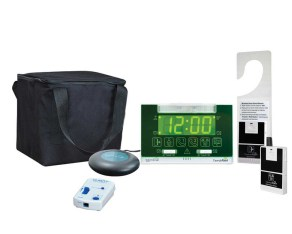
ADA Guest Room Kit

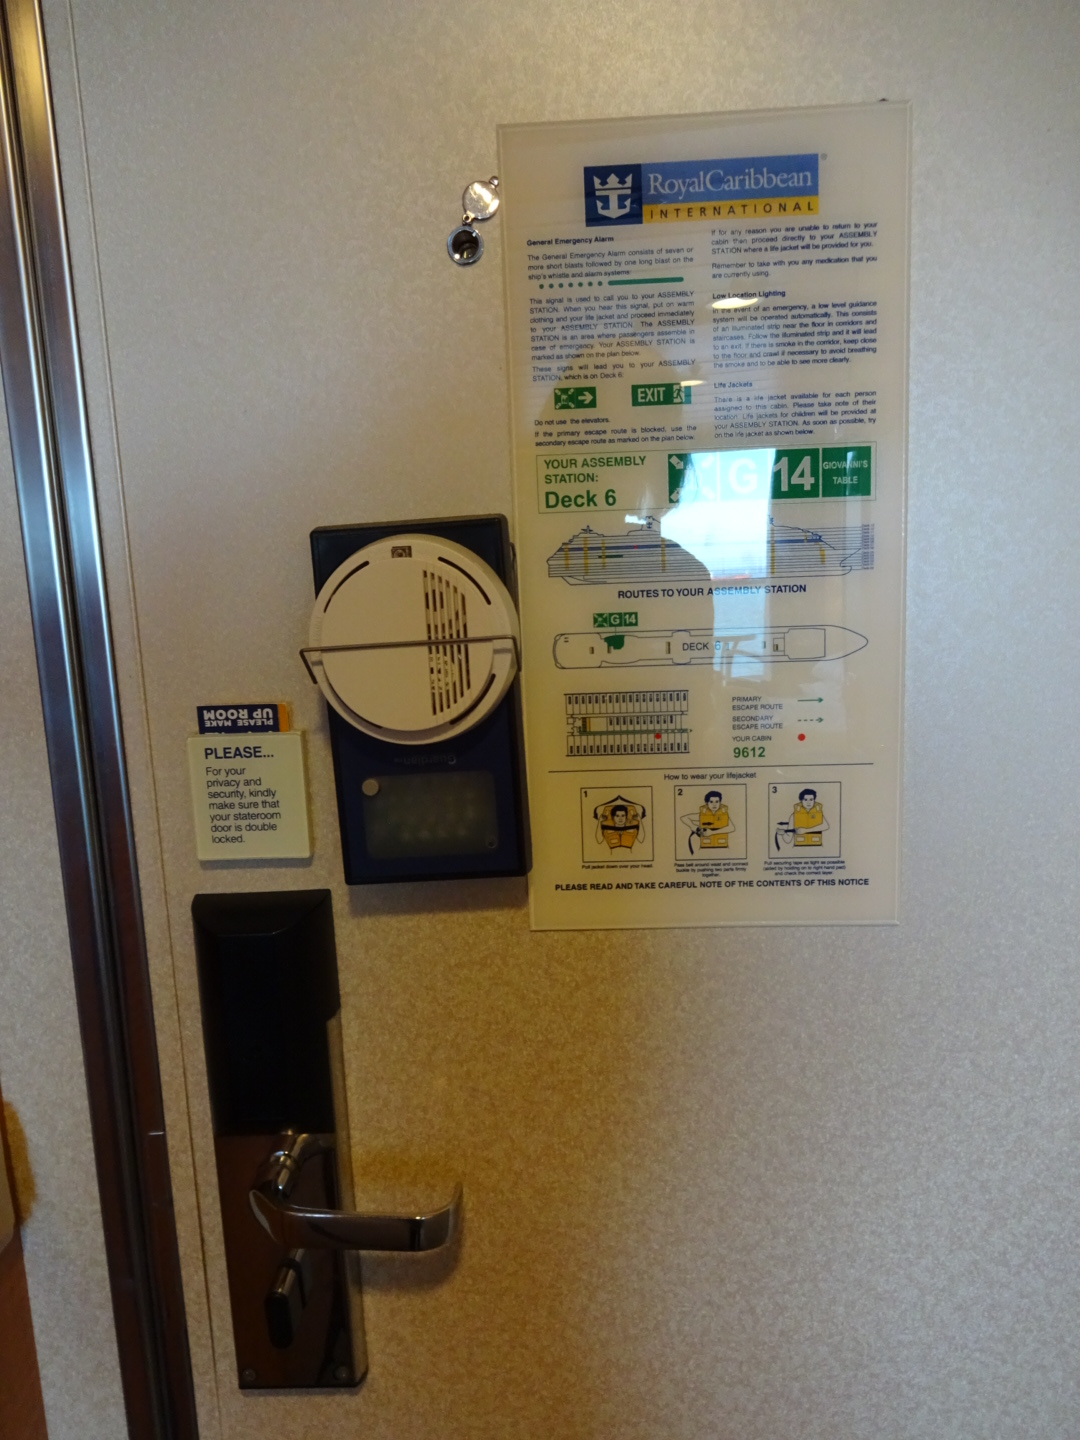
I am currently on a Baltic Cruise.  This time I requested an ADA Guest Room Kit in advance.  Upon my arrival, I was happy to see that it was already installed. The phone alert works great – it is attached to both a bright flashing light and a bed shaker.

IMG_1856 IMG_1860

I can never miss a call!  However, I can’t hear a darn thing on the phone as the sound quality is so poor!  Oh, well, it’s progress. There is also a device hooked to my door to help me hear when someone knocks.  I’ve never seen a set-up like this.

IMG_1861 IMG_1862

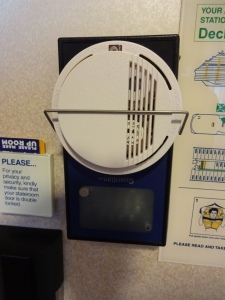
I believe this is supposed to be sensitive to vibrations, but the door is about 2 inches thick and very heavy.  If I were worried about someone entering my room, this would be great.  When the door opens, the light on the door flashes and the device by the bed also responds.  HOWEVER, when someone knocks on the door, nothing happens!!  Well, if you pound really hard, preferably with a hard object, it does work.  Sigh.

So basically it is very annoying as anytime we go in or out, all the bells and whistles go off!  I figured out how to turn it off and only turn it on at night.  I wonder if this door knock sensor would be better.  Serene Innovations hanging door knock sensor.  Have any of you used this, either at home, in a hotel or on a cruise?

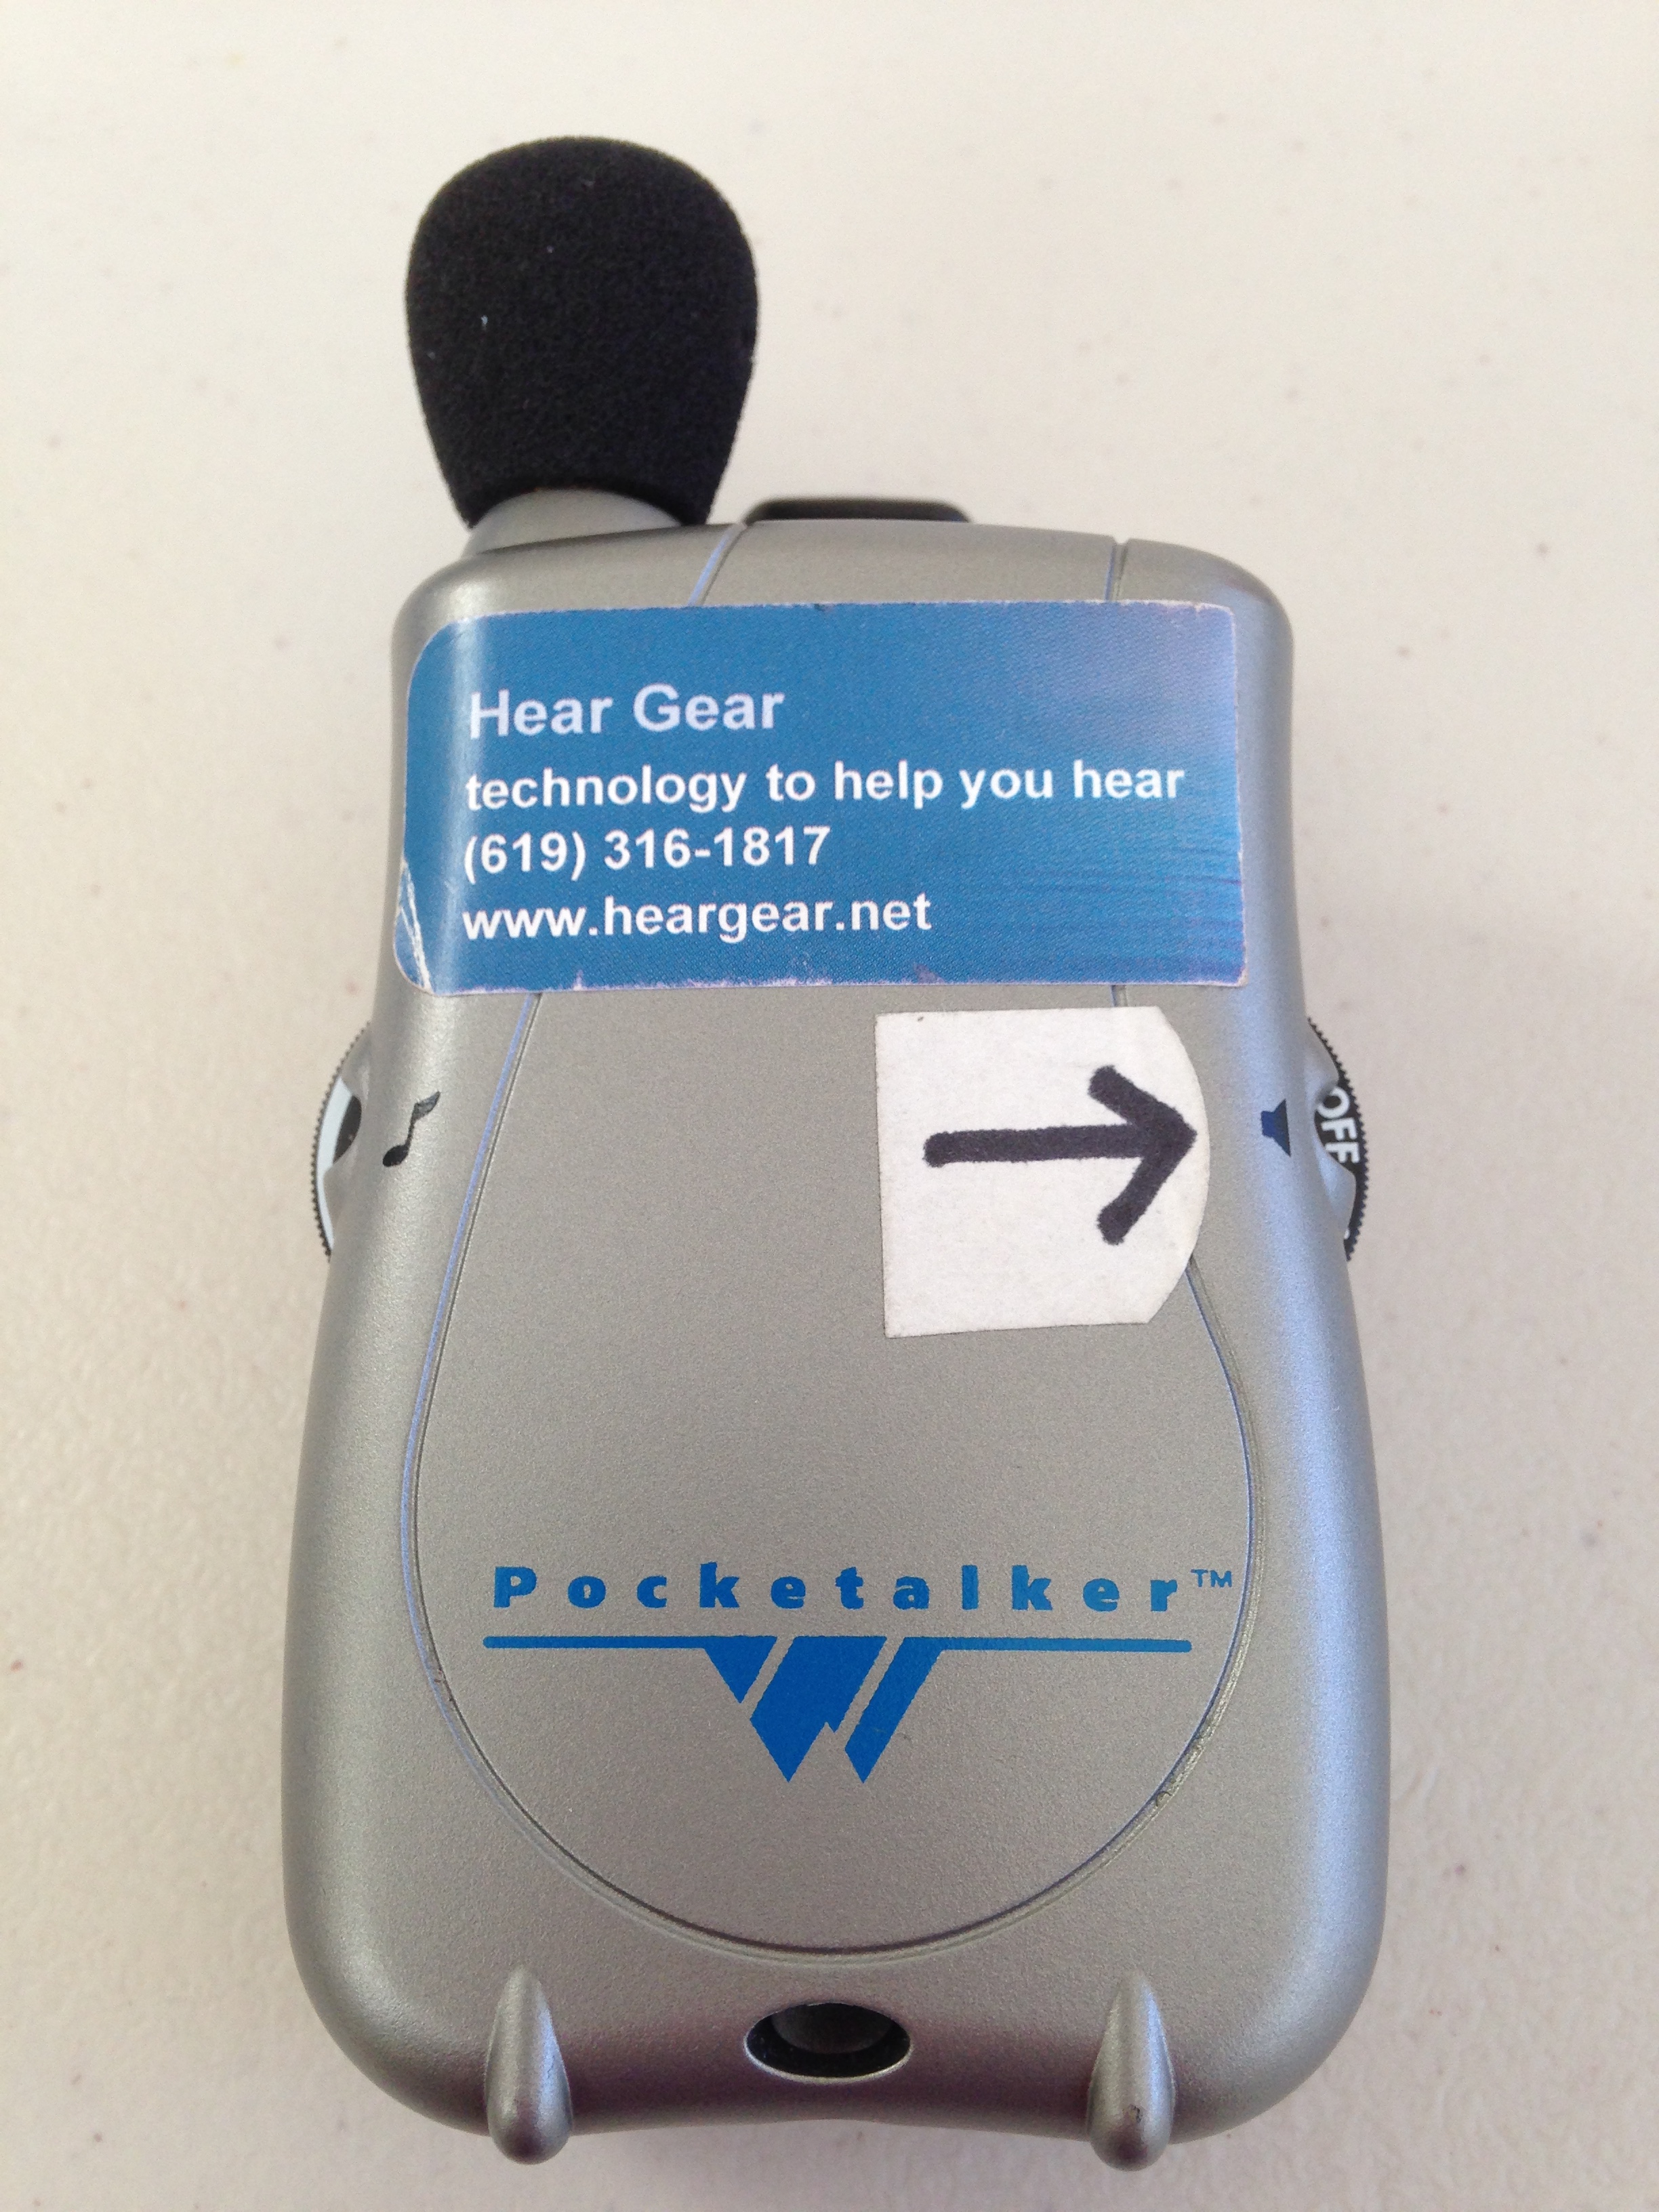
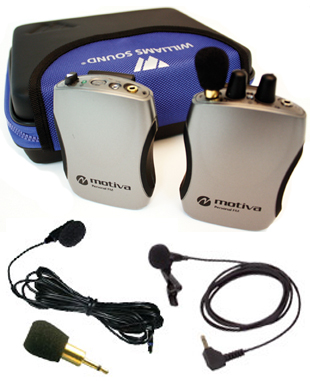
Assisted Listening Device

I wrote to Royal Caribbean before the trip and mentioned I would also like to have an assisted listening device for the theater.  When I went to the Guest Service Desk to check out the listening device, the man at the desk had to make several phones and proudly told me:
“Yes, I have confirmed it.  An assisted listening device is installed!”
“Yes, but I need a receiver.”
After more calls and a trip to the back room, he brought me a nice new pair of Listen Technologies headphones, still in their original bag.  LOL!!

This whole scene would be funny if it weren’t so pathetic.  Obviously, Royal Caribbean has not trained their staff on what accommodations are available.  Anyway, I told him to go back and look for a little black box and also to see if there was a wire to go around the neck.  Amazingly, be returned with the receiver and a neckloop.  Once we determined it needed batteries, I was good to go! I rushed to a lecture I was now late for, turned on my handy dandy receiver and………..nothing!

It was clear no me that the FM transmitter was not on.  After the Guest Services man made a few more calls, we determined, indeed, it was not on.  They turned it on and at all future events it worked.  Success!

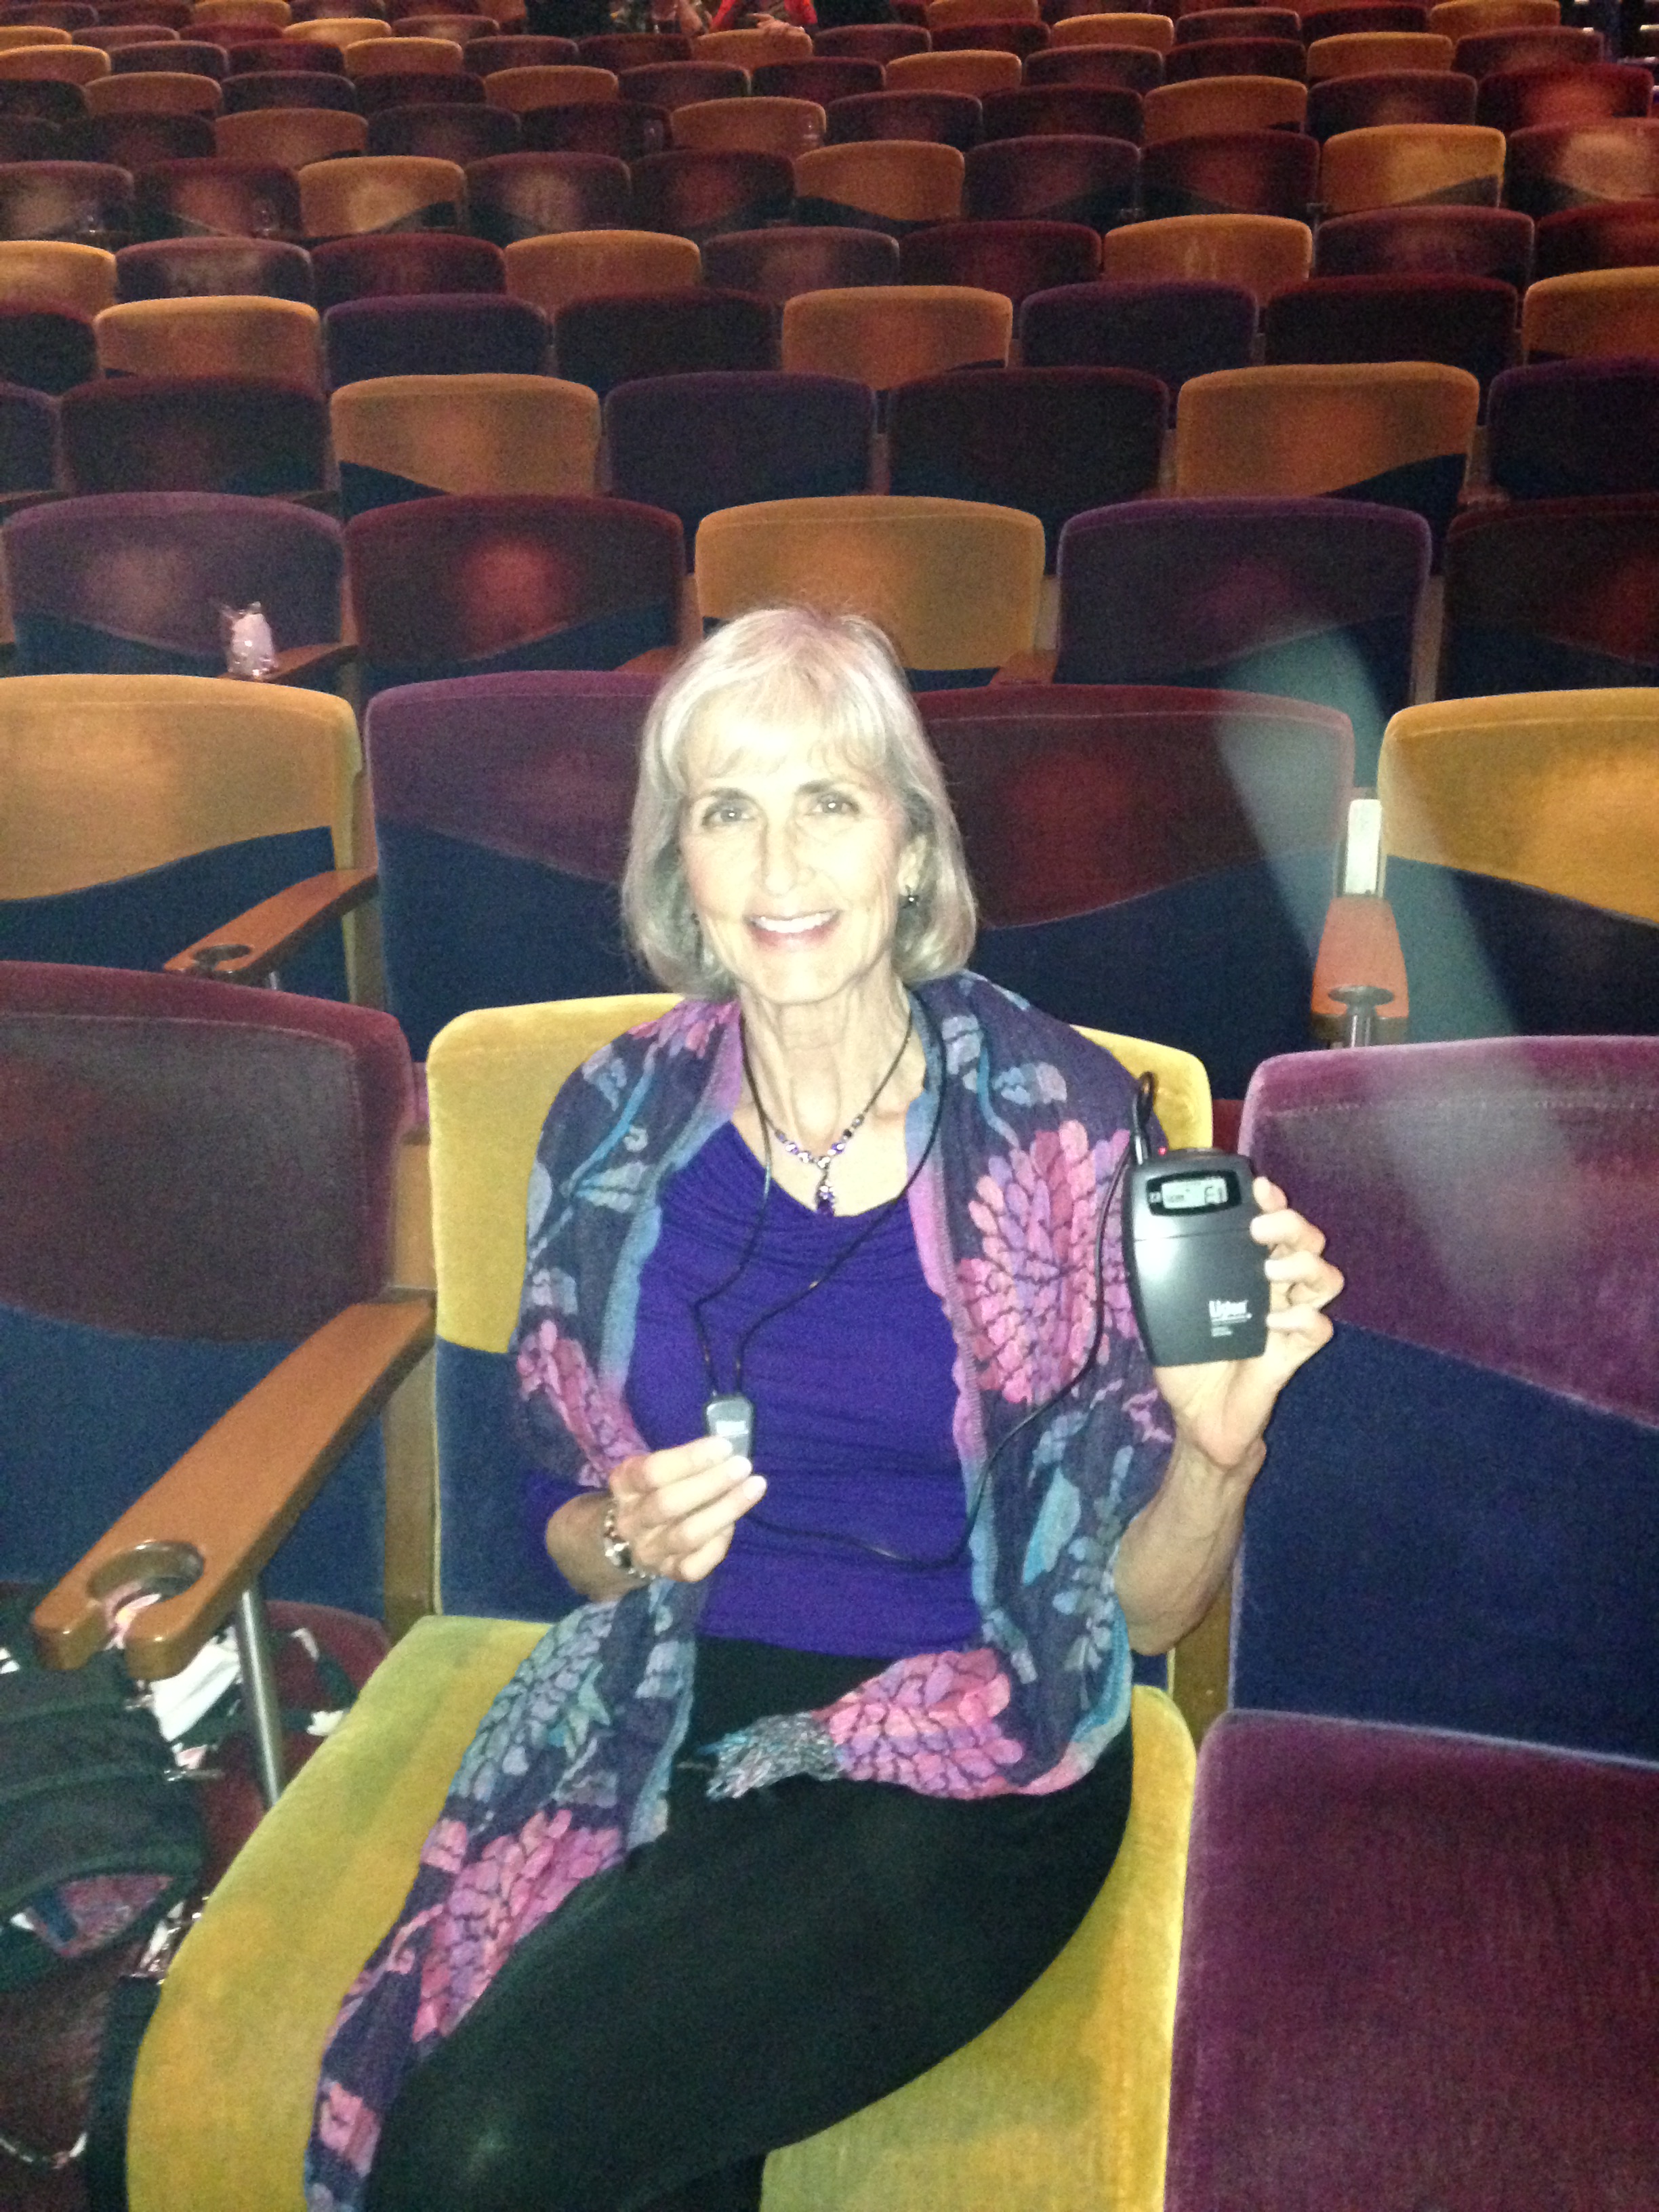
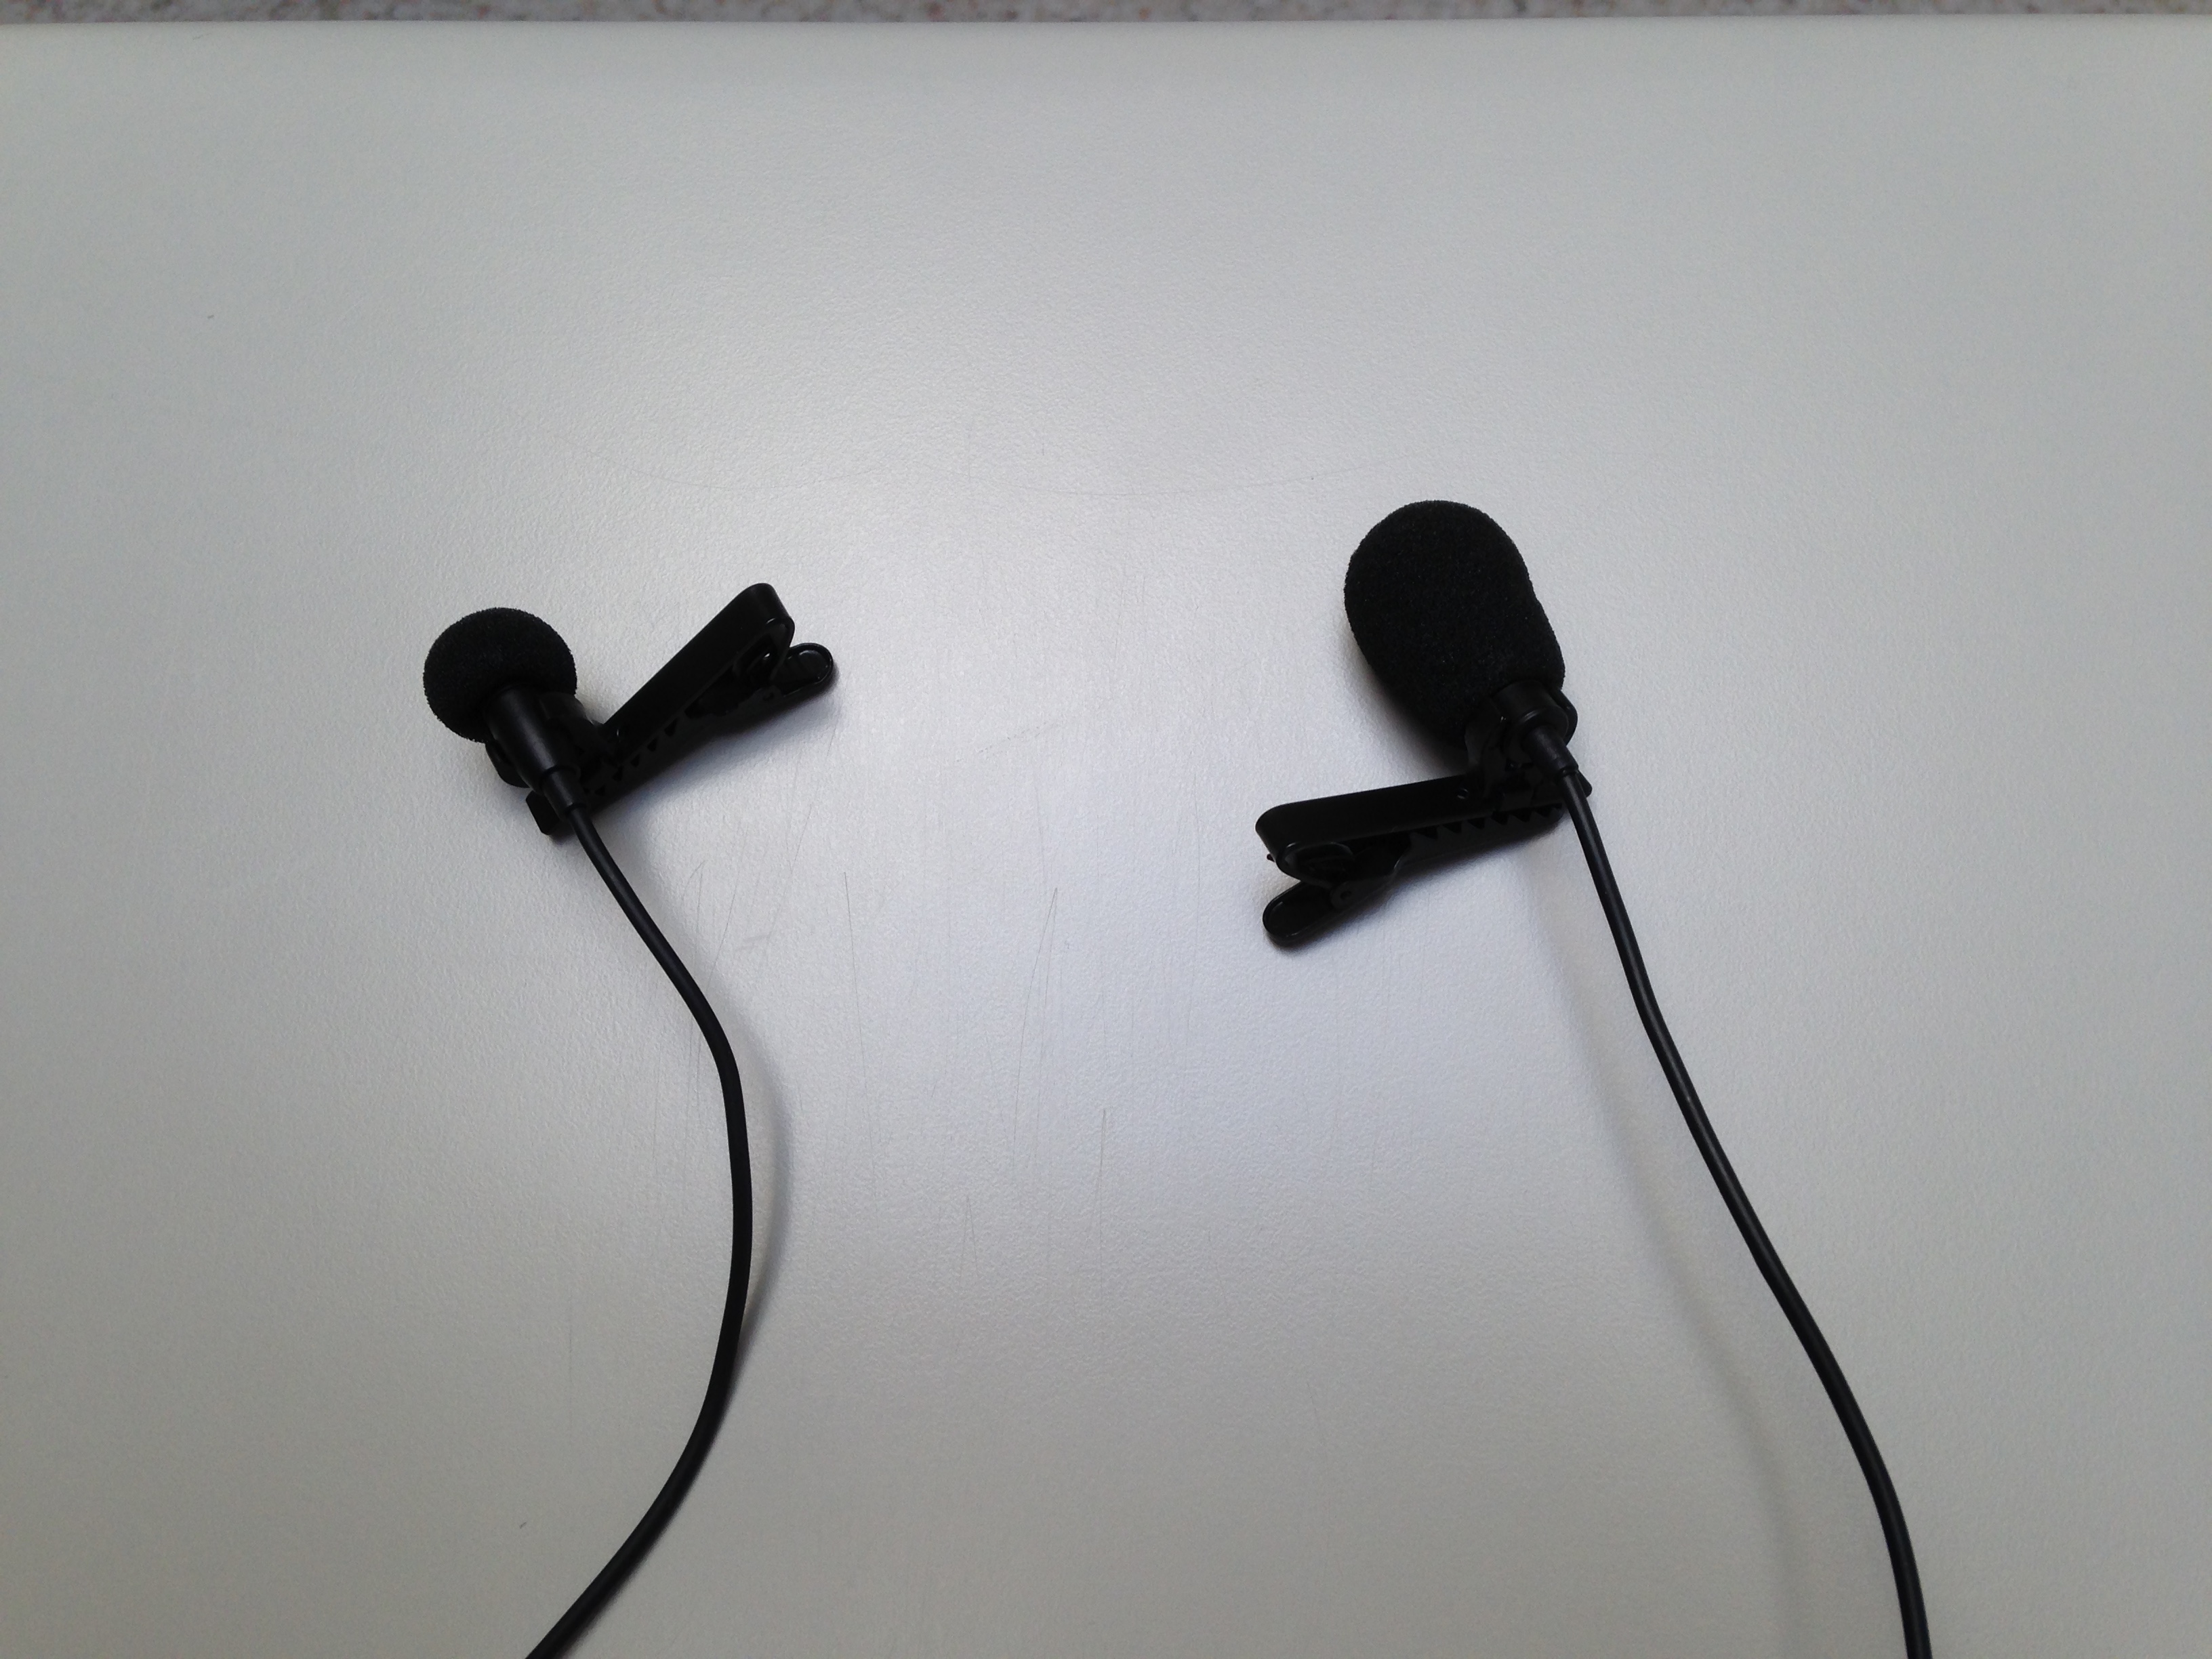
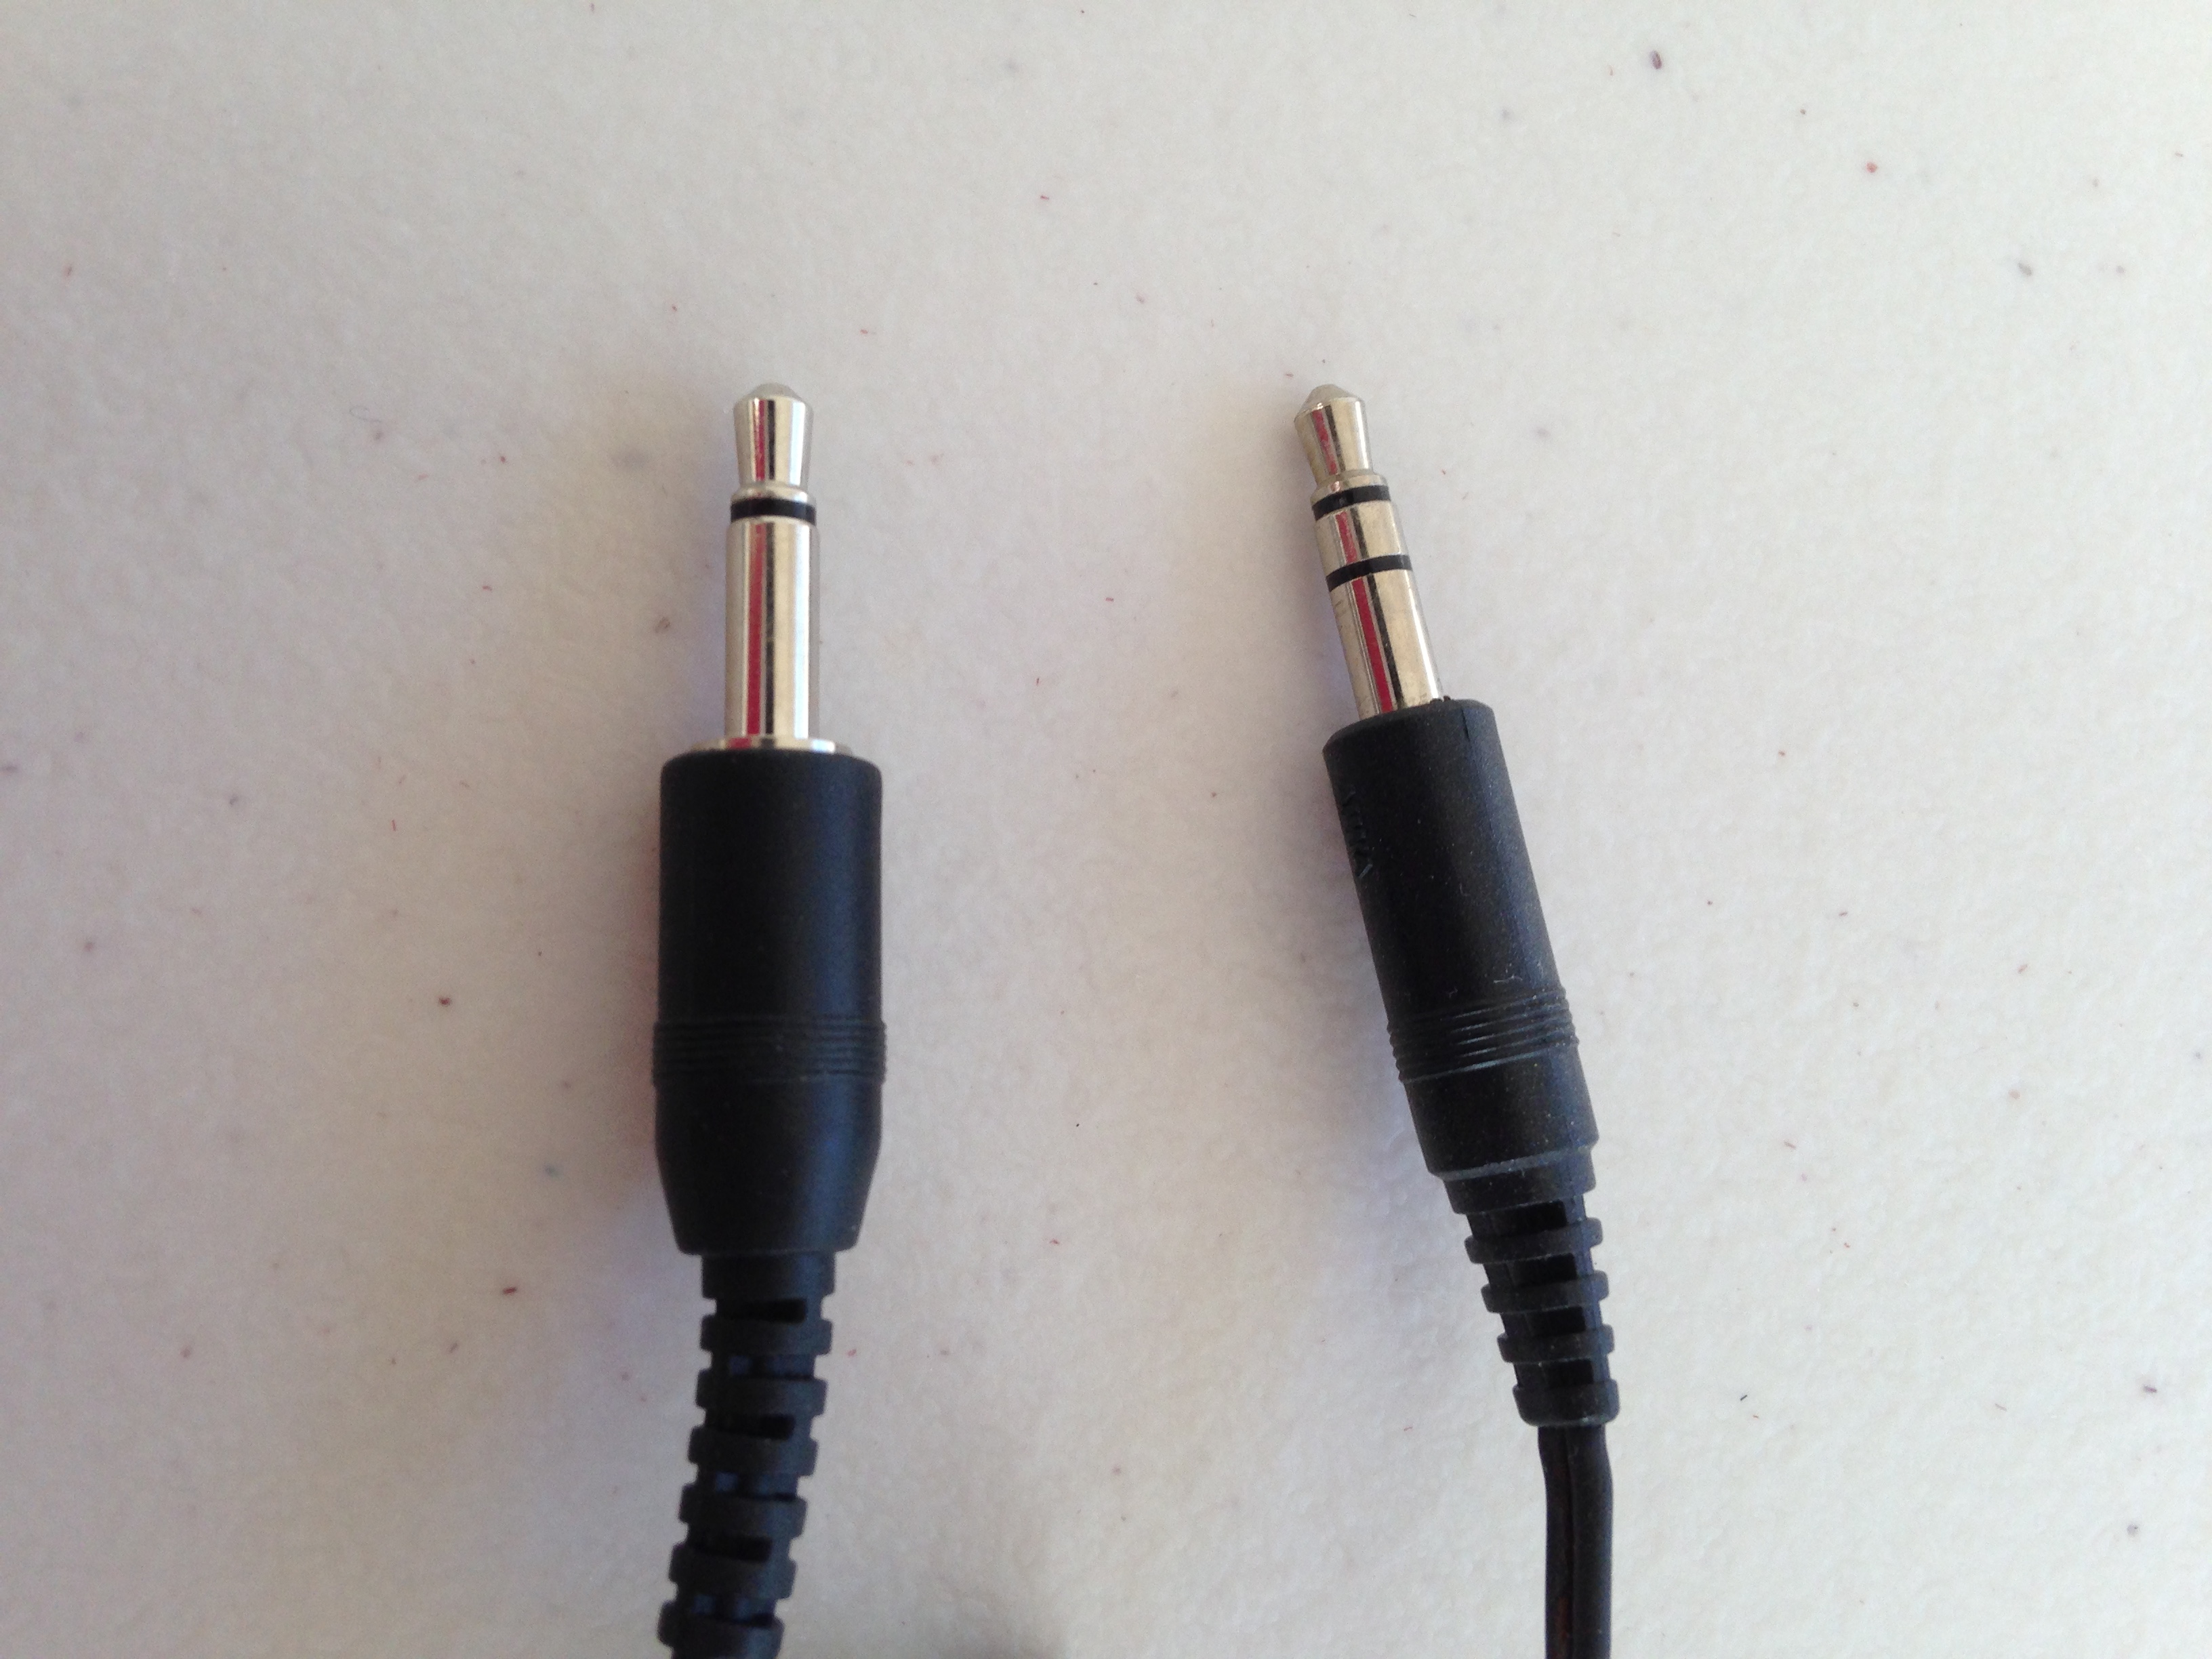
I used my own neckloop with it as the Listen neckloop is not powerful enough.  You have to hold the wire right next to your ears to hear anything (or loop it over your ears and look really geeky!).  I have found that to be true of any neckloop that is not amplified (has a battery and a volume control).  I  recommend always traveling with an amplified neckloop.  The Clear Sounds CLA7-V2 is a good one.  Or if you like silhouettes, that would also work better than an unamplified neckloop.

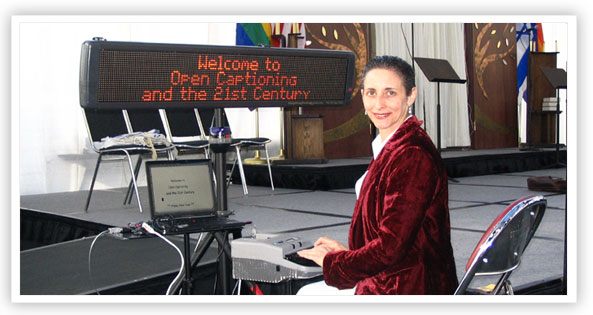
Here I am, happily modeling the finally working FM system!

IMG_1785

TV Captions

This is a sad story!  As soon as I got to my room, I turned on the captions but did not see any appear.  I called the tech guy and he could not get them on either.  He said some shows were prerecorded, but even the shows that were not prerecorded had no captions.  So basically he told me the TV’s on the ship do not have captions.  Not being one to give up easily, I went to the gym and asked the staff there if she could get captions on their TV.  She tried but no success.

I have asked about the captions at the Guest Services Desk three times (I think they know me now!) and got three different answers:
1.  It only works on certain channels.
2.  It only works when the ship is within range of the satellite that sends the captions.
3.  Since we re-did our system, we no longer can receive captions. (Oh, and the first guy told me HE received captions on CNN in his stateroom!)

I am persistent and will not give up on this issue until I am sure there is nothing more I can do.  I wrote an email to the Special Needs Department of Royal Caribbean, but they have not answered.  Finally spoke to one more person on the ship who seemed to know for sure that there are NO captions on this ship!  Bummer!

If you ever go on a cruise, I suggest emailing the cruise line and find out if the ship you are thinking of going on has captions. And try to ask the question in two or three different departments as some people just don’t know.  This is the address for Royal Caribbean Special Needs Department:  special_needs@rccl.com.  They are very slow to reply, but I am going to ask for a list of all their ships that DO have captions.  If I get it, I’ll post it here. Don’t hold your breath!

Don’t cruise ships need to provide ADA accommodations?  Royal Caribbean was founded by a Norwegian group but based in Miami.  Does anyone know if ADA regulations apply to cruise ships?

Counter Loops

Before getting on the ship, we spent one night at a hotel in Harwich, England.  I saw this sign at the front desk.

IMG_1743 IMG_1744

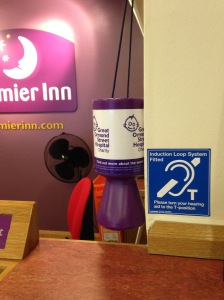
Cool!  I knew Europe and especially England were way ahead of the U.S. in using hearing loops.  I told the young man at the front desk I would like to use the hearing loop.
“The what?”
I pointed to the sign.
“Huh?  I don’t know nothin’ about that.”

The next morning a different person was at the front desk. She knew what it was and turned it on.  I turned on my t-coil.
“Can you hear me?”
“Not well.  Where is the microphone?”
She showed me a small 4 inch desk microphone sitting about 3 feet from her mouth.  If I leaned forward and she leaned down, I could pick up her voice through the loop….barely.  I’m not very familiar with counter loops but I suspect it was not installed properly.  Or maybe the microphone was just too far away.  I have experimented with the Portable InfoLoop  and it works great with a lapel mic or even better with a headset mic.

Sign Language

I’d like to end with a more upbeat story,  When traveling in Asia, I was hoping to meet people using sign language.  I am studying ASL and want to learn about sign language in other countries.  In the most unlikely place, while hiking in the hills north of Ubud, Bali, I ran into this cute couple from Australia.

IMG_8723

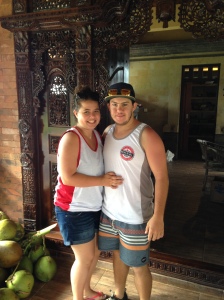
They were sitting at a cafe and signing to each other!  I was so excited!  I  approached them and started signing.  I learned that in Australia they use British Sign Language, but the man understood me.
“How can you understand me when I am using ASL?”
“I watch YouTube videos and they are in ASL!”
Yay!  YouTube!  I was surprised to learn that British finger-spelling requires 2 hands. Seems like that would be difficult.  I am hoping to visit a school for the Deaf in London so hope to learn more about their education system and British sign language.

Thanks for listening to all my woes.  If you have had similar successes or failures while traveling, I would love to hear about them.

Good Communication Stategies

Effective Communication Sign

In my last post, I wrote about a workshop I attended in Fresno.  The workshop was presented by Samuel Trychin, Ph.D. and Janet Trychin, Au.D.  (For more information about Sam and Janet, see the January/February 2015 issuue of the HLAA Magazine.)  I would like to share some of their great ideas for improving communication.  I found that many of these ideas were not new to me, but realized that knowing good communication strategies and practicing good communication strategies are NOT the same thing!  I have been found “guilty” in breaking many of these communication rules!

Sam uses the term “communication partner” to refer to the person we are communicating with.  The primary communication partner may be your spouse, child, roommate, or parent.  However, the most important communication partner is the person you are communicating with right now!  So these strategies apply to everyone in your life.

Strategies from the Trychins’ Workshop:  “You Never Listen to Me and Other Hearing Loss-Related Stories.”

Communication Partner Guidelines

  • Pick the best spot to communicate
  • Get the listener’s attention before talking
  • Be sure your face can be clearly seen
  • Do not have objects in your mouth
  • Speak slowly and clearly
  • Rephrase if you are not understood
  • Inform listener when changing subject
  • Don’t shout
  • Try to be patient, calm, and relaxed
  • Speak to, not about, the person who is HOH
  • Use facial expressions and gestures
  • Ask for tips to improve communication

Listener Guidelines

  • Practice relaxation skills beforehand
  • Pick the best spot to communicate
  • Anticipate difficult situations-plan ahead
  • Inform others how best to talk to you
  • Pay attention to the speaker
  • Look for visual cues of what is said
  • Do not bluff  (don’t pretend to understand when you don’t)
  • Inform the speaker about what you heard
  • Reinforce speaker’s helpful communication
  • Set realistic goals for understanding
  • Ask for key words in writing if needed
  • Arrange for breaks if meetings are long

Lessons I Learned

1.  Guilty as Charged!
One of my rules at home is, “Don’t talk to me from another room!!”  It is a hard habit to break, but my husband, Don, has become very good about this.  However, I learned that I don’t follow my own rule!  Yes, I don’t want Don to yell at me from another room, but I have been doing just that to him!  If I want to talk to him, I need to go to him.  I can’t expect him to come running to me every time I want to talk!

2.  My Interpreter
Oops!  Another thing Sam talked about really hit home.  I need to manage my own communication difficulties.  Don is NOT my interpreter.  I have come to rely on him to tell me what someone said.  Instead, I need to let the person I didn’t hear know I am hard-of-hearing and ask them to please repeat. This is going to be a hard pattern to change as it is so much easier to turn to Don with the “Huh?” look on my face and have him tell me, but it is not a healthy habit, so I will work on it.

3. Keep Calm and Communicate
Something I never considered before is that when I get anxious and stressed about not understanding, this anxiety is communicated to my communication partner.  As his/her level of anxiety rises, the situation becomes less pleasant.  Why not smile, make eye contact, take a deep breath, let the person know you have a hearing problem, and ask for clarification?  An important point here (and in #2 above) is not to just ask the person to repeat, but to identify yourself as someone with a hearing loss.  This helps the other person to understand the problem.  It’s not that you are dense, inattentive, or a trouble-maker.  You are just “a bit deaf”! (“a bit deaf” is an expression I learned from a British woman)

Resources for Better Communication

www.trychin.com – Sam has several books and DVD’s including:
Communication Rules – a book and DVD that provide specific examples of what people should and should not do in communication situations.
Living with Hearing Loss:  Workbook – a workbook that provides exercises known to be helpful in changing communication patterns and improving relationships.

Rachel Henrickson, Audiologist at The University of Kansas Physicians, created this video which has some great role playing examples to illustrate good and poor communication behaviors.

The Hearing Loss Association of America also has some good tips on their website:  http://hearingloss.org/content/living-hearing-loss

Try it!

I have heard from so many couples who have problems because one partner has a hearing loss.  It always seems that one or the other partner refuses to change his/her behavior.  Just as you would sit down and talk about what to do if one partner was unexpectedly confined to a wheel chair, you need to sit down and talk about solutions to living with a hearing loss.  Start small.  Pick one or two strategies and try them out.  My guess is that you will feel so much better that you will want to continue to improve.  So, just try it!

Do you have other ideas you have found successful?  Please leave a comment and share it with others!  Thanks!

The Silent Garden

I was fortunate to be able to attend a workshop at California State University, Fresno last weekend let by Drs. Sam and Janet Trychin.  The Trychins were featured in the January/February 2015 issue of Hearing Loss Magazine. 

The workshop, “You Never Listen To Me and Other Hearing-Loss Related stories: Real World Communication Solutions,” addressed communication problems between the person with a hearing loss and his/her “communication partner” (spouse, parent, child, etc.).

It was wonderful to be in a workshop that was 100% accessible!  There was a hearing loop installed by Jeffrey Klug, owner of Cooper Loop

IMG_9519

There was also a team of oral interpreters for those who lip-read exclusively, a team of sign language interpreters and captioning!  I didn’t miss a word!

IMG_9523

After Sam presented obstacles to good communication along with solutions and strategies to improve communication, Janet directed members of the audience in role playing some of these frustrating situations. Very fun and a good way to help us remember what NOT to do!

IMG_9546  IMG_9550

‎The workshop is part of an endowment by the Silent Garden, a program within the Department of Communicative Disorders and Deaf Studies at Fresno State that provides educational workshops for the deaf and hard of hearing community.

The Silent Garden was founded by Dr. Paul Ogden, Professor Emeritus at California State University, Fresno.  The name of the program was taken from Dr. Ogden’s very popular book, The Silent Garden – Raising your Deaf Child.
IMG_9507

I’ll share some of the good communication strategies I learned in my next post!

Traveling with a Hearing Loss

To my Hear Gear followers,

Sorry I haven’t posted anything lately.  My husband, Don, and I will be moving to Denver in July.  We have decided to put all our belongings in storage and travel until then.  So, I am now a homeless wanderer!  But I will be back!  My Hear Gear website is still open www.heargear.net and you can contact me at marilyn@heargear.net if you have any questions about listening devices.

Meanwhile, I would like to share some of my experiences traveling with a hearing loss.  I would also love to hear any travel advice or stories you would like to share.  Please leave a comment.

About 2 years ago, I gave a presentation to our HLAA Chapter about traveling with a hearing loss and the PowerPoint is available  on my website, but that was more oriented to travel within the U.S.  Traveling in foreign countries is a whole different experience.

First of all, don’t expect one of these ADA Compliant Hotel Room Kits.

Untitled

Actually, cruise ships do have them, but the Royal Caribbean ship I went on was unable to come up with one.  I was told, “Broken” or “I’ll contact you” or “What’s that?” by various staff members and never got it.  Granted, I should have requested one ahead of time, but I didn’t think I would need it.  After realizing I couldn’t hear a knock on the door or hear on the telephone, I asked for one.
Good lesson:  always reserve an ADA room kit for a hotel or a cruise before you arrive!

I really don’t think I am THAT hard of hearing, but I have had a struggle with hearing on this trip.  So far, this is how I have felt while traveling abroad:

Image result for what?

One reason is that everyone (EVERYONE!) I meet has a foreign accent.  I’m currently in Bali and the locals all have strong accents and the women speak very softly.  The fellow tourists are mostly from Australia or Europe.

Another reason I don’t perceive myself at “THAT” hard of hearing is that at home I limit my interactions and environments.  I didn’t realize how much I control my environment at home until I was out of my comfort zones.  At home I rarely go out with a large group, avoid noisy restaurants, and take an assisted listening device to events I know will be difficult.  I rarely need to ask directions, get information from a hotel employee or taxi driver, or ask someone with limited English about the food ingredients.  Suddenly out of my usual environment, I had to admit, “I am THAT hard of hearing!!”

On the cruise, I met a sweet British woman who was sitting at a nearby table.  My husband was doing all the talking and I finally told her, “Sorry, but I’m having trouble hearing in this noisy room.”  She asked me, “Are you a bit deaf?”  I loved that expression!!  Yes, I’m a bit deaf!  I have been telling people that ever since.  “Sorry, I’m a bit deaf.  Could you please speak up?”  You know how we are always debating how to identify ourselves and what is the politically correct way to refer to us?  Are we hard-of-hearing, hearing impaired, deaf, Deaf, or (the worst) are we suffering from hearing loss?  Well, from now on, I’m “a bit deaf”!

One of the fun things about traveling is meeting new people – sharing travel stories with other travelers and getting to know the locals.  I must admit, I have become rather anti-social.  It’s just so difficult!  That makes me sad.  Also, I have become VERY dependent on my husband (who hears perfectly).  That makes me mad!  I don’t like to dependent!  Fortunately, he is a good sport and doesn’t mind “interpreting” (repeating) things to me.

IMG_7926
My patient “interpreter”

What can be done to improve the situation?  Bring assisted listening devices!

[If you don’t use assisted listening devices at home, don’t bother to bring one.  It takes some time to get used to using them and probably not something you would start using on a trip.  However, if you have never tried one, I certainly recommend it.  All my listening devices have a 30-day satisfaction guarantee.  You could try one to see how you like it].

This trip I am traveling very lightly.  I told myself I could only bring one assisted listening device.  I decided to bring my Pocketalker.  If you have been reading my blog, you know that is my favorite, small, inexpensive listening device.  I also brought my Oticon Streamer and a lapel microphone.  (That’s still just one device!  They all work together.)  I’m glad I have them, but there are many times I wished I had my Oticon Connectline Microphone and/or an FM system.

microphone
The Oticon Connectline Microphone and Streamer

If you wear Oticon hearing aids, you might remember that I tried the microphone several years ago and ended up returning it.  It just didn’t work well for me.  I decided to try it again and now love it…..for certain situations.  It doesn’t work well for one-on-one conversations with someone sitting close-by as there is an echo/delay.  (Of course, that is what I wanted it for.)  It doesn’t work well in a noisy environment as it picks up too much of the background noise, but it works great for a lecture or class.  I am currently taking yoga classes and guided meditation classes and really wish I had it!  It is so small and light that it is easy to ask the speaker to clip it onto his/her shirt.  I didn’t bring it because I wasn’t sure I could charge it without a converter.

When traveling overseas, you need to bring adapters to fit your electronics into the different types of outlets.

images

Years ago, I always traveled with a converter, too (after melting my curling iron without one.)  But now most electronics have a built-in converter.  I am able to charge my netbook, iPad and Oticon Streamer with just an adapter, no converter.  I wasn’t sure if the charging cord for the microphone would work without a converter, so I didn’t bring it.  I will look into that before my next trip!

I will probably also bring the Conversor Pro FM system.  I wrote about this in The Pros and Cons of Three FM Systems.  It is the smallest and will be the easiest to pack.

So, be prepared on your next trip overseas!  Don’t leave home without  your assisted listening devices!  Just eliminate that extra pair of shoes and you’ll have plenty of room!


Captions! Captions! Captions!

I have met several people lately who said they can’t go to movies anymore because they can’t hear well enough.  Also, many people I meet do not talk on the phone as it is too hard to hear.  So, I want to write about captions, captions, and more captions!

TV Captions – most people know about TV captions, however some do not know how to turn them on.  Turn them on!  They are great!  Some remote controls make it easy with a “CC” button, but usually you have to click on “Menu” and “Language” or “Audio” or “Accessibility”.  It isn’t that difficult.  Do it!

Movie Captions – almost all movie theaters now have a captioning device.  All AMC theaters have a system called CaptiView.  It is a device that fits into your cup holder with a bendable support arm and a small digital screen that displays the captions.  You can adjust it so it sits right under your line of sight to the screen and it is easy to read.  I love them and try to never to go to a movie without captions.  All Regal theaters have a different captioning system called Sony Entertainment Access Glasses.  The glasses project the captioning onto the lenses.  They work well, but I think they are uncomfortable to wear, so prefer the other type.  Another system similar to CaptiView is the USL Closed Captioned System (CCS) which is also excellent.  Some older theaters might have the Rear Window Captioning.  With this system, the captions are projected from the rear of the theater onto a plastic screen in front of you.  To use these captioning devices, just go to the customer service desk and ask to check it out.  I don’t know why more people don’t know about this.  Maybe the theater doesn’t advertise it as they are afraid they will have to purchase more devices.  Most theaters currently only have a few, so arrive early to be sure you get one.  And, of course, foreign films will be captioned with subtitles so you don’t need to check out a device.

captiview-in-seat-300x209

CaptionFish  Caption Fish is a fabulous search engine for captioned movies.  It will find all the captioned movies in your area and tell you where they are playing.  You just put in your zip code and “Go Fish”!  You can download an app for your phone or tablet or go to http://www.captionfish.com on your computer.

33119d29b42b49a29871a1d0f3fe06cb

Live Theater Open Captioning – Many theaters are now starting to have one open captioned performance for each show.  It is usually on a Saturday or Sunday matinee.  In San Diego, the Civic Theater and the La Jolla Playhouse have open captioning.  Just check their websites under “Plan Your Visit” – “Special Needs” or “Patron Services.”  Best to call for tickets to be sure you get seats near the captioning screen.

mainPhoto

Captioned Telephones – There are several types of captioned telephones on the market.  Many of these are free for people with hearing loss.  See the “Specialized Phones” section of this page on my website.

9116-83535_Small

Captioned Cellphones – There are also several services for captioning cell phone calls, such as Hamilton Mobile CapTel, Sprint CapTel, InnoCaptions, CaptionCall, and ClearCaptions.  These services are also available for your computer or tablet.

sprint-captel-phone

CaptionCall iPad App – CaptionCall has recently come out with a CaptionCall app for the iPad.  You need to contact CaptionCall to have a technician come to your home and set it up.   I have it and love it!  It looks just like the land line screen and the captions are quick and very accurate.  It also captions your voice messages.  This app is so new, they are not advertising it yet and it is not available in all states, but you can call 877 557-2227 for information.

IMG_7525

Live and Remote Captioning – Captioning is an accommodation for Deaf and hard-of-hearing and can be provided live or even remotely.  With live captioning, the captioner is present and sends the captions to a laptop, tablet or screen.  In remote captioning, the captioner is not present, but has an audio feed and sends the captions via the internet.  Captioning can be used at schools, business meetings and conferences.  There are many companies that provide these services such as eCaptions and Quick Caption.

So, please don’t stop enjoying live theater, movies and talking on the phone!  Share this information with your friends and if you have more information to add, please leave a comment.  I  would love to hear about your experiences with captioning.

Advanced Tips for Using a Pocketalker

If you have been following my blog for a while, you know that I LOVE the Williams Sound Pocketalker!  If you have recently purchased one, I encourage you to read my list of basic tips on how to use the Pocketalker

Once you are familiar with the Pocketaker, these “Advanced Tips for Using a Pocketalker” will help you learn ways to adapt your Pocketalker to your listening needs. With a little creativity, you’ll find the Pocketalker can help you hear better in many challenging situations.

1.  Use a lapel microphone. You can remove the plug microphone and insert a lapel microphone. Clip it to the collar of the person you are talking to and background noise will be reduced while the speaker’s voice is amplified. This is very effective in the car and in a restaurant. For more about this see my blog post:  Noisy Restaurant – Recipe for Success Lapel Mics                  omni-directional mic on left (my favorite) and directional mic on right

2.  Use a conference microphone. A conference microphone such as the Centrum Sound Single Conference Microphone or the Centrum Sound Dual Conference Microphone can be placed on a table at a meeting. It will pick up sound from people sitting around the table. This is excellent in a meeting where one person speaks at a time. I do not recommend it for a noisy room or a restaurant.

3.  Use an extension cord. The Pocketalker comes with a 12-foot extension cord for watching TV. This is too long to use to talk people around a table or sitting in the living room. At Radio Shack you can buy a 3-foot or a 6-foot audio cord. This will extend the reach of the Pocketalker and let you pass it around a table or hand it to someone sitting too far away to hear.

Headphone with microphone extendedextension cord to headphone

IMG_7244extension cord for microphone

There are two ways to do this. You can use the extension cord between the headphone jack on the Pocketalker and your headphones (or neckloop) or you can remove the plug microphone from the Pocketalker, plug it into one end of the extension cord and plug the other end of the extension cord into the microphone jack of the Pocketalker.

4.  Create a “microphone stand.” Using a 3-foot cord between the microphone and the Pocketalker and the stick-on clip that is included for listening to TV, you can place the microphone in a vertical position to better pick up talk around the table.Plastic cup mic standI always carry a tote bag for my listening devices so I just added this plastic cup to my collection. I put my car keys in the cup to stabilize it…………and so I don’t accidentally leave my fancy microphone stand.

5.  More tips.  The Pocketalker is a mono device.  The Williams Sound headphones and earbuds have a mono plug.  If you want to use your own stereo headphones or earbuds, you need a stereo to mono adapter (available at Radio Shack – Part # 274-882 or 274-368.)

Mono and stereo jacks Mono plug has one black line.
Stereo plug has two black lines.

adapterStereo to mono adapter

Here is a close-up of the type of extension cord (audio cord) you can use for expanding your reach.

IMG_7080

The microphone and headphone jacks have tiny pictures that are difficult to see, but just remember that the microphone jack has a raised base.

Pocketalker Pulgs

It may be helpful to draw an arrow pointing to the on/off and volume control. The knob on the other side is for tone and can usually be set once and left alone.

Label the Volume Control

Now you are a Pocketalker expert!  If you have other creative techniques for using the Pocketalker, please share your ideas below!

Farewell Motiva!

I am sad to say that Williams Sound is discontinuing the Motiva Personal FM System.  This is my favorite FM system!

PMF360with mic

In fact, a recent experience reminded me of how helpful it can be in a classroom or workshop.  I am currently taking an American Sign Language (ASL) class at a local junior college.  Besides loving ASL, I enjoy the fact that I usually don’t have to worry about hearing in the classroom!  However, the teacher isn’t deaf and sometimes we have class discussions about Deaf culture.  Whenever we do, I bring some sort of listening device.

Last week I was so frustrated that I did NOT bring my Motiva system!  The device I brought allowed me to hear the teacher perfectly!  But……..I couldn’t hear any of the questions or comments from the students!  One of the things I like about the Motiva is that it has a microphone on the receiver.  So, I can hear the teacher wearing the transmitter (who could be over 100 feet away!) AND I can also listen to the students sitting relatively nearby by using the microphone on the receiver.  In a quiet room with only one person speaking, the microphone on the receiver will amplify voices of people sitting 12 – 15 feet away.

For more information about the Motiva 360, please see my previous blog post:  The Pros and Cons of Three FM Systems.
If you would like to purchase the Motiva, I suggest doing it ASAP!  It will be available for a few months so buy yourself or a loved one a very useful holiday gift!  You can buy it with a charger or without the charger.

If you would like to buy one, I am offering a 15% discount. Use the coupon code M360
Click here for the Motiva Personal FM System with Charger.
Click here for the Motiva Personal FM System (no charger).

So glad I have mine!

Wireless Microphones for Hearing Aids

In my  last blog post, I wrote about using an FM system in a yoga class.  Although it can be very effective in some limited situations (and certainly was for me!) in general, it is too cumbersome to use in an exercise class.  So, now I want to share with you some information about wireless microphones that send the sound to your hearing aids or streaming device.  As far as I know, GN Resound and Starkey are the only brands that send sound directly into the hearing aids.  If you know of others, please leave a comment!
All the other wireless microphones need an intermediary device such as a neckloop or FM boot.  I recommend buying these devices from an audiologist, as most of them need to be programmed to work with your hearing aids, but I have listed prices I saw online, just to get an idea of the cost.

Phonak Wireless Accessories

Phonak is the “King” of wireless!  They have developed a new technology called “Roger.”  See this website for more information about the Roger technology. http://www.fmhearingsystems.co.uk/phonak-roger-vs-phonak-fm/

Roger uses digital modulation (DM).  DM is a type of FM system and according to one company, using DM they “…. can get a much larger dynamic range, which makes the sound quality much better and improves intelligibility.”  Phonak claims a 54% improvement in listening in noise with the Roger Pen compared with traditional FM systems.

The Roger Pen is expensive! $1,500 on Amazon but it is both an FM system and a Bluetooth Streamer…and more.  This video explains more about the Roger Pen.

=


In addition to the Roger Pen, Phonak has 2 other wireless microphones:  the Roger Clip-on Mic. (≈$420), and the Phonak Remote Mic. (≈$200).  Phonak also has a whole line of Roger for Education devices.
The Roger Pen and Roger Clip-on Mic must be used with either small Phonak Roger receivers that attach to the hearing aids or cochlear implants (CI’s) or the Roger MyLink neckloop.  Some Roger receivers are designed specifically for Phonak hearing aids, but the Roger X is a universal receiver that will work with most hearing aids and CI’s.  The Roger MyLink neckloop is a universal Roger receiver compatible with all hearing aids with t-coils.  The Phonak Remote Mic works with the ComPilot (neckloop).

GN Resound Unite Mini Microphone ($260 on E-Bay)

The Unite Mini Microphone is a wireless mic that sends the sound directly into the Resound hearing aids. No neckloop or receiver needed.  The Unite Mini Microphone is small and can easily be clipped onto the user’s shirt.

Starkey Surflink Mobile ($550 on Amazon) ($650 on ebay)

The Surflink Mobile is a cell phone transmitter, wireless microphone, media streamer, and hearing aid remote all rolled into one.  It has built-in directional and omni-directional microphones that send the sound directly into Starkey hearing aids.  The Surflink Mobile can be worn around user’s the neck with a lanyard.

Oticon ConnectLine Microphone ($279.99 on Amazon)

The Oticon ConnectLine Microphone does not send sound directly into the hearing aids.  The Streamer Pro (neckloop) must be worn with it.  The ConnectLine Microphone is small and can easily be clipped onto the user’s shirt.

Siemens VoiceLink Microphone ($175 – $199 online)

The VoiceLink Microphone does not send sound directly into the hearing aids.  The MiniTek Streamer must be worn with it.  The VoiceLink Lapel Microphone can be clipped onto the user’s shirt, but the attached transmitter would also need to be clipped to a shirt or belt.

? ? ? ? ? ? ? ? ? ? ? ? ? ? ?

Now, the real question is………..how well do these devices work?  I tried the Oticon ConnectLine Microphone about 2 years ago.  I was terribly disappointed and ended up returning it as the sound quality was so poor!  I recently decided to order it again and give it another try.  Maybe mine was defective…or the technology has improved.

Although I became interested in learning more about these microphones to find a good solution for a yoga class (without having a neckloop flopping around during “Downward Facing Dog”!) my real need (and the need for all hard-of-hearing folks) is to find a good solution for noisy restaurants.  So, if you have experience with any of these or other wireless microphones, I would LOVE to hear from you.  Please write a comment and share your experience!  Thank you!